
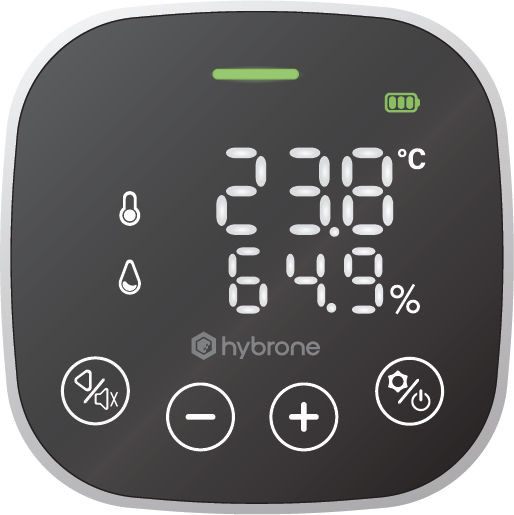
About the Hybrone Smart Air Quality Sensor
HY-SW1081-AQ
STEP 1
Hybrone Account
First of all, you must have a Hybrone Cloud account to deploy and manage the Hybrone Air Quality Sensor.
You can complete the device setup process by logging into your Hybrone account with the Hybrone Mobile application. In your account, select the location where you want to add the device and then click the add new device button. The add new device wizard will be launched.

Communication Definitions and Considerations
An active internet connection is required to track the device and receive notifications.
Device setup is done with the Hybrone mobile application.
The instructions on the application show the necessary procedures.
Before starting the setup, router settings may need to be adjusted. The device supports 2.4 GHz Wi-Fi frequency band. The router Wi-Fi frequency must be set to 2.4 GHz band. Also make a note of the Wi-Fi name and password. The device sends health information to the Hybrone server every 8 hours in the absence of any alarm. If 3 consecutive times no health information is received, the device is considered offline.
STEP 2
Adding a Device to Hybrone
In Hybrone Mobile application, the wizard for adding a new device is started and the instructions on the screen are followed respectively. Here, device type "IoT Sensor" and device brand "Hybrone" should be selected. In the next steps, your device will be found automatically and the wizard will continue and the device addition process will be completed.

If your device cannot be added automatically, you can try the manual addition method.
By opening the manual addition screen, you must first enter the Wi-Fi information you want to connect the device to the internet and then set the connection mode on the device.

Flashing Fast

Press and hold the key for about 5 seconds, the network icon
 flashes rapidly (approximately twice per second), the interface has a 3-minute countdown is displayed and the device enters the EZ network connection state.
Flashing Slow

Press and hold the key for about 5 seconds, the network icon
 flashes rapidly (approximately twice per second), then turns on the network press the
 key briefly within 5 seconds to stop.
More then long press for about 5 seconds, the network icon
 flashes slowly (approximately every 3 seconds), on the interface 3 a countdown of minutes is displayed and the AP displays the network connection status enters.
According to the connection mode you have set, select the same mode on the relevant screen in the Add new device wizard and continue.
If networking is successful, the icon will remain lit and "ON LINE" is displayed on the interface, and then the device returns to the main interface. If networking cannot be done within 3 minutes, networking fails and
  remains on for one second and power off, "OFF LINE" is displayed on the interface and then thereturns to the main interface after seconds.
Tips
This guide due to the upgrade and update of the app, may differ slightly from the actual operation; please follow the instructions in the application follow.
 If the network connection fails, please move the device closer to the gateway and try again.
 Please add the device to the gateway first, then install and fix.
Activating the Device
Once your device has been successfully added, the new device addition wizard will direct you to the device subscription package selection screen. On this screen, select the appropriate subscription package, continue the steps in the wizard and complete the process of activating your device in your Hybrone Account.

Wall Installation
1. Attach the positioning label to a suitable location.

2. Drill the holes with a Φ 5 mm drill bit.
Important : Drilling Do not damage any cables and please protect the detector from dust keep away.
3. Insert the plastic dowels into the drilled holes and screw heads approximately 5 Tighten the screws until mm is positioned outside.

4. Then hang the product on the screws to complete the installation.
Table Stand
1. For desktop use, use the stand bracket included in the box and place the device on a flat and dust free surface.
2. Make sure the device is stable and prevent CO2 from penetrating the device make sure that no objects are in the way.

Device Control & Buttons

1. In normal state, short press to change the display.
2. Switch to the left position in Setup mode.
3. In Setup mode, decrease the value one by one.

1. In normal state, short press to change the display.
2. In Setup mode, switch to the right position.
3. In Setup mode, increase the value one by one.
4. Long press (approx. 5 seconds) to enter the network enter the state.

1. Enter mute mode by short pressing in normal state.Mute mode, press briefly once more to exit.
2. In Setup mode, press briefly to return to the previous page,exit the current setting.

1. Turn the power on/off with a long press (about 5 seconds).
2. In normal condition, when powered by the AC adapter, a short press to turn the display off/on.
3. Press and hold the and
and buttons simultaneously for about 2 seconds, the device will enter setup mode.
4. In setup mode, the setup of the current short press to enter the state.
Symbols

Screen Menu Pages
1. When the device is switched on, the CO2 menu will appear first.
2. Navigating to the previous and next page in standby mode.
Press the or icons for
 .
.

Menu Settings
1. Press and hold the and
and keys simultaneously for approximately 2 seconds. hold, the device will enter setup mode and the setup icon
 will light up.
2. Short press the or
or key to turn the display on. Current screen Short press the
 key to enter the setup status of the page.
CO2 Setting Page
1. Maximum CO2 alarm value: MAX and max. value flash, value Short press or
or to increase/decrease
2. Min. CO2 alarm value: MIN and min. value flash, value Short press the or
or key to increase/decrease.
3. Press the key to switch between the max. and min. value settings short press.
4. Press to save the setting and return to the previous menu.

Temperature Setting Page
1. The " °C/°F " icon flashes, to toggle between
Short press the or
or button.
2. The maximum temperature value : MAX and max. value flash,
Short press the or
or key to increase/decrease the value.
3. Minimum temperature value: The MIN and min. value flashes, the value
Short press the or
or key to increase/decrease.
4. Press to toggle between the maximum and minimum value settings.
short press the key.
5. Press to save the setting and return to the previous menu.

Humidity Setting Page
1. Maximum Humidity value: MAX and max. value flash, value
Short press or
or to increase/decrease
2. Minimum Humidity value: MIN and min. value flashes, value
Short press the or
or key to increase/decrease.
3. Press to toggle between the maximum and minimum value settings.
Press the button briefly.
4. Press the key to save the setting and return to the previous menu.
Time and Date Setting Page
1. Number flashes, time and date Press or
or to set short press.
2. Switch between time and date setting short press the key to make the adjustment.
3. Press the key shortly to save the setting values and short press the  key to return to the page press.
4. Note: After the device is connected to the network time and date will be synchronized.

Silent Mode Setting Page
1. Number flashes, time and date press the or
or button to set short press
2. Maximum and minimum values to toggle between short press the key.
3. To save the values and to reset the previous press to return to the page short press.

LED Indicators and Sounds
1. When the device is powered via adapter.
LED | Indicator | Sound | |
The screen is off, CO2 level is good | Every 5 seconds flashes green | - | - |
The screen is on, CO2 level is good | Lights green | Normal | - |
The screen is off, CO2 level normal | Flashes yellow every 5 seconds | - | - |
The screen is on, CO2 level normal | Lights Yellow | Normal | - |
The screen is off, CO2 level is poor | Flashes red every 5 seconds | - | - |
The screen is on, CO2 level is poor | Lights red | Normal | - |
CO2 level good -> normal | 30 seconds yellow flashes | Data 30 seconds flashes | - |
CO2 level normal -> bad | 30 seconds red flashes | Data 30 seconds flashes | 30 seconds alarm sound alarm |
2. When the device is used with batteries:
When the carbon dioxide level is "low", the display turns on, red LED and The display flashes and the alarm sounds for 30 seconds.
After that, the red LED and the display will stay on for 1 minute then the display turns off.
The red LED will flash every 5 seconds until the CO2 level returns to normal flashes, then the amber LED flashes every 5 seconds until the CO2 level returns to good flashes every second, and then the green LED flashes every five seconds flashes.
3. When "Silent Mode" is active:
When the carbon dioxide level is "low", the display will turn on, the red LED and the display will flash for 30 seconds. Then the red LED and display 1 remains illuminated for minutes and the display turns off.
The red LED lights every 5 seconds until the CO2 level returns to normal blinks, then the yellow LED will flash every 5 seconds until the CO2 level returns to good flashes every second and then the green LED flashes every 5 seconds goes out. The default time for "Silent Mode" is 22:00-08:00. This time can be changed in the settings.
4. Temperature and Humidity:
Temperature and humidity values below or above the specified ranges the other alerts are the same as the CO2 content, without the audible warning.
Default temperature values: Min. 15℃, Max. 35
Default humidity values: Min. 15%, Max. 90%.
Default values can be set in the settings menu.
Battery Information
This device contains one lithium ion battery. Batteries are for professional can be replaced or removed by persons.
Flammable pain, gas and do not charge and use in environments where there is a risk of explosion, such as dust.
Never incinerate the product! The battery may explode in a fire. This can also cause toxic substances will also be released. Charging the device only use the supplied micro USB cable and a suitable charger (power supply unit DC5V/1A). Charge the device do not leave unattended while it is happening.
Battery: Ensure normal operation of the device for approximately 6 hours. Can support and has a built-in charger protection design. First charge for at least 24 hours if you are charging once.(Battery life here value varies according to different conditions, so only for reference purposes).
Maintenance
 Dusty appliances need to be cleaned. Air conditioning of devices dust accumulations at the inlets can be swept or blown away.
 If necessary, you can remove dust with a brush.
 The surface can be cleaned using a cloth slightly dampened with soapy water. can be cleaned.
 Do not allow water to get into the appliance!
 Do not clean the device in the dishwasher!
 Sharp, pointed, abrasive or corrosive cleaning materials or hard brushes !
 Do not use chemicals and do not use the device at high do not clean with flammable liquids.
Errors and Troubleshooting
Errors | Troubleshooting |
Screen Failure | The power supply unit is powered and that the cable is firmly plugged into the device check the battery. Check the battery for more than 24 hours. charge it. |
Slow Response | Air flow on the rear panel of the device that their channels are not blocked please check. |
Device "Error" Notification | Please contact your seller. |
ATTENTION
The information contained in the user manual is for reference only and does not constitute a commitment of any kind. Without the written permission of the manufacturer, no person or organization may remove or copy part or all of the contents of this
User manual and shall not disseminate it in any way. As technology is constantly updated, the manufacturer reserves the right to make changes to the user manual without prior notice. If the user manual and actual operations are inconsistent, the final interpretation herein rests with the manufacturer.
Was this article helpful?
That’s Great!
Thank you for your feedback
Sorry! We couldn't be helpful
Thank you for your feedback
Feedback sent
We appreciate your effort and will try to fix the article